Hello everyone!
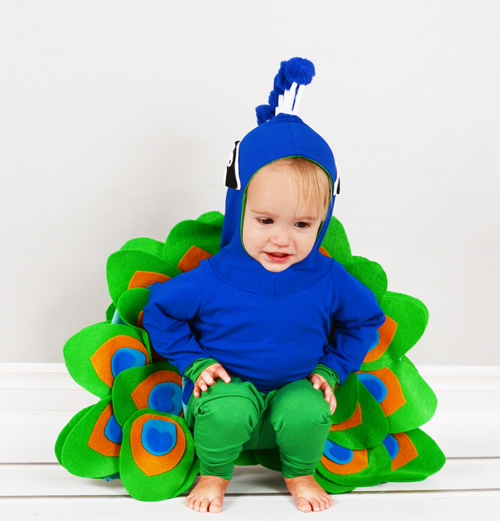
With the Halloween costume contest running, I wanted to sew my own costume for Eleanor. The first thing that came to mind is a peacock so I went for it. 🙂
If you have sewn a costume go enter it in the contest! We have some awesome prizes so check it out! You can also vote for others, 1 vote every 24 hours. ENTER CONTEST or VOTE.
If you are still looking for a costume idea, follow the post and make your own little human peacock! (click the photos to see them larger)
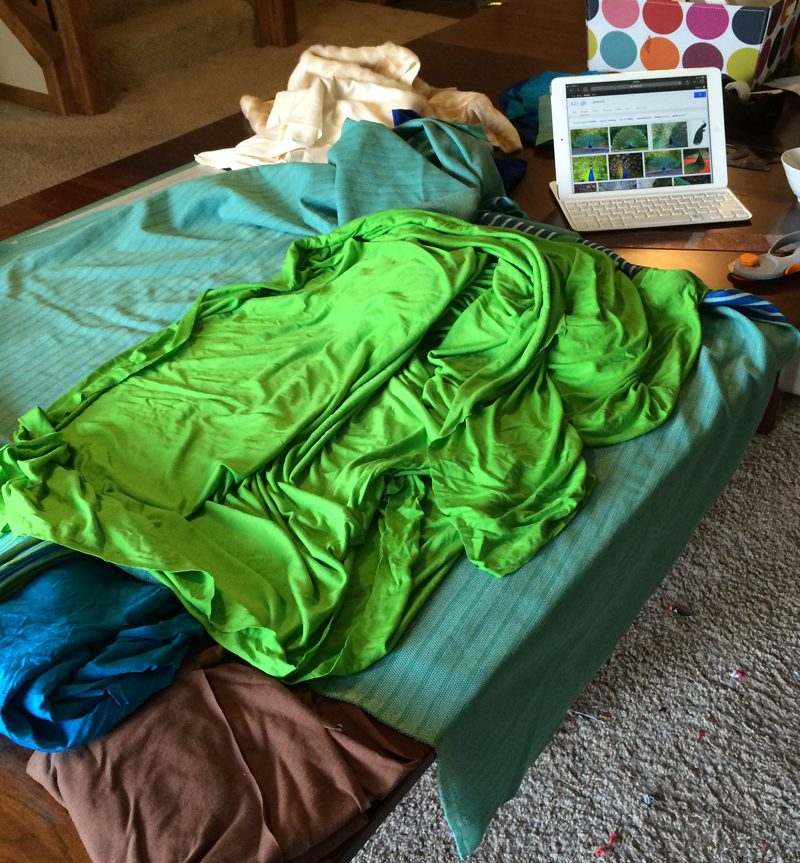
I found some images of peacocks and gathered my most accurate colored fabrics.
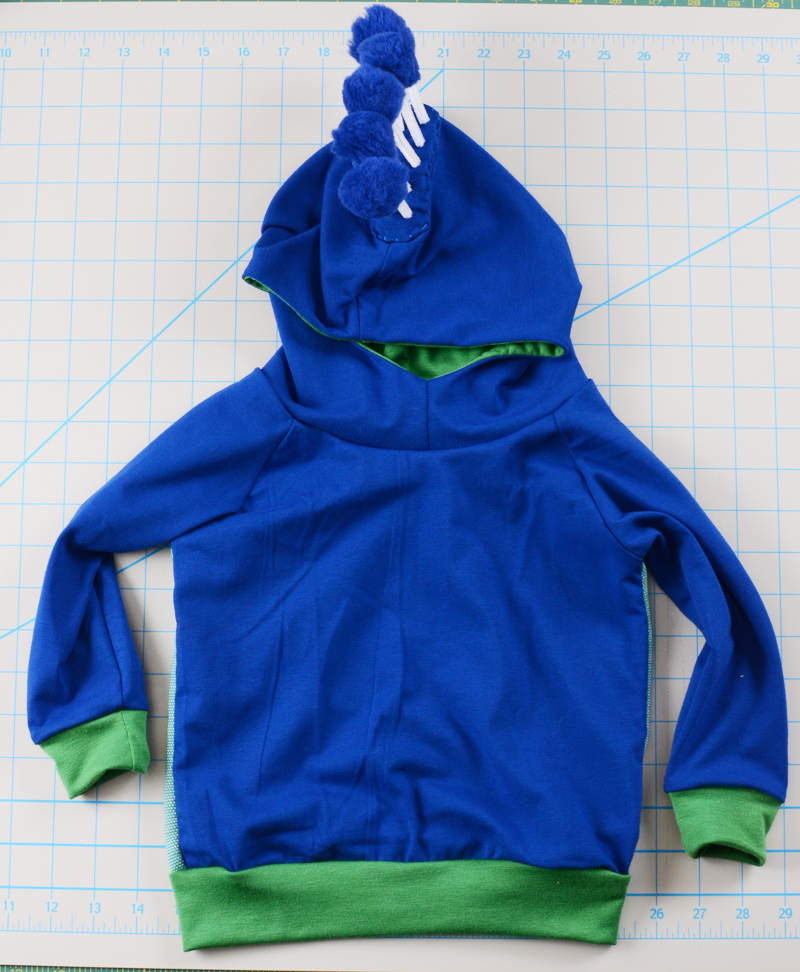
TO START::: I cut out my raglan sweatshirt pattern in cobalt blue, modified with a hood to use for the base. You could use any hoodie to start with. P.S. I will be giving away that hooded raglan pattern next month!
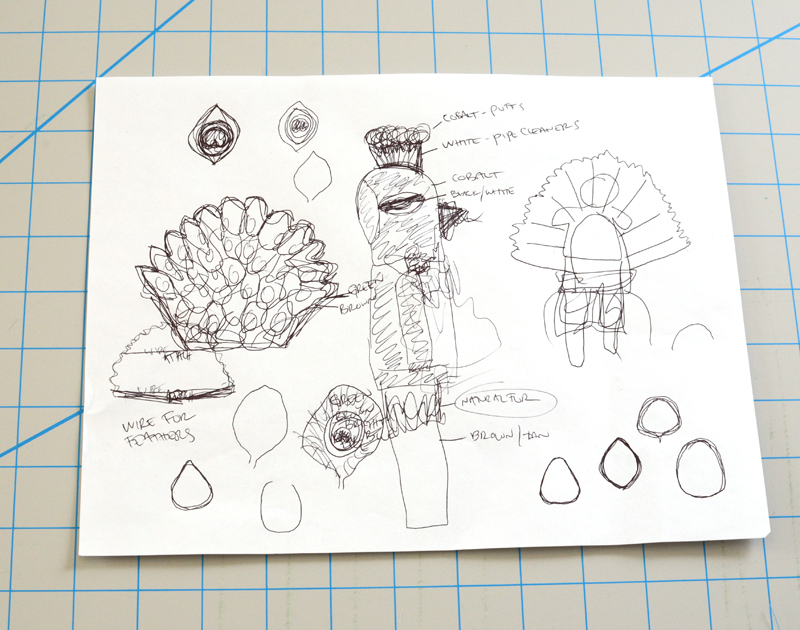
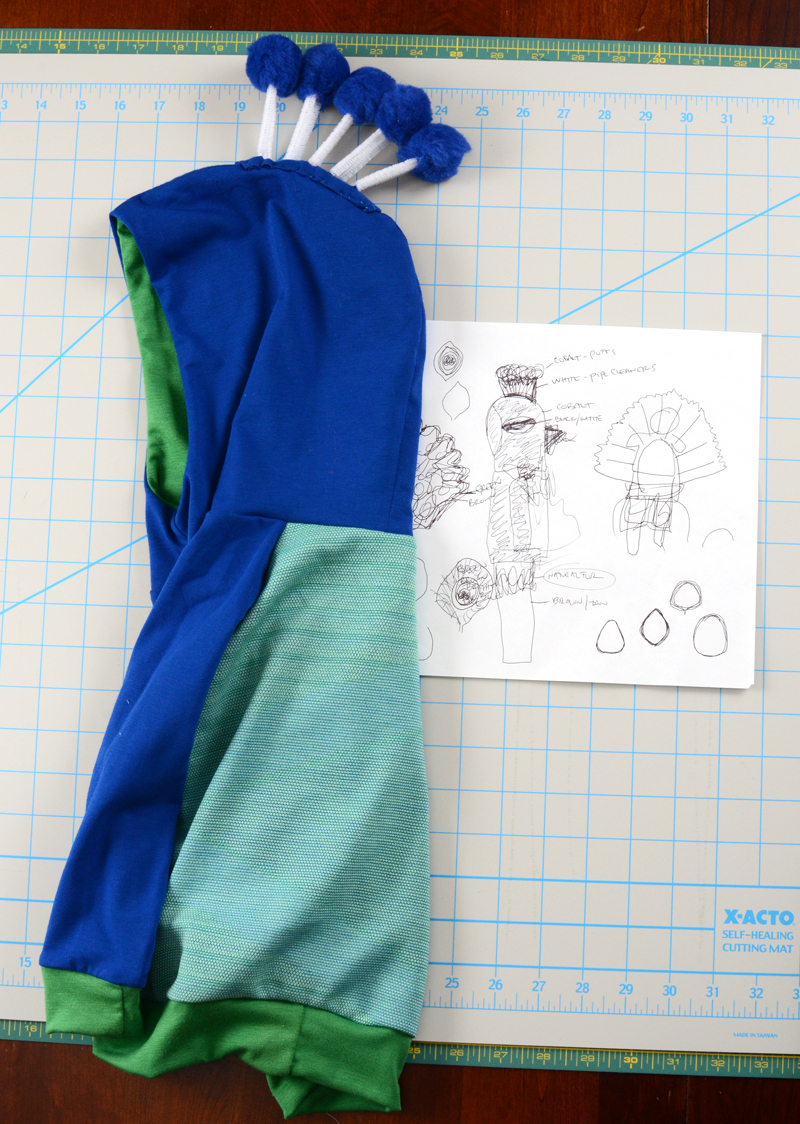
This is my sketch page: don’t worry if you only see scribbles, I may be the only one that can interpret it.
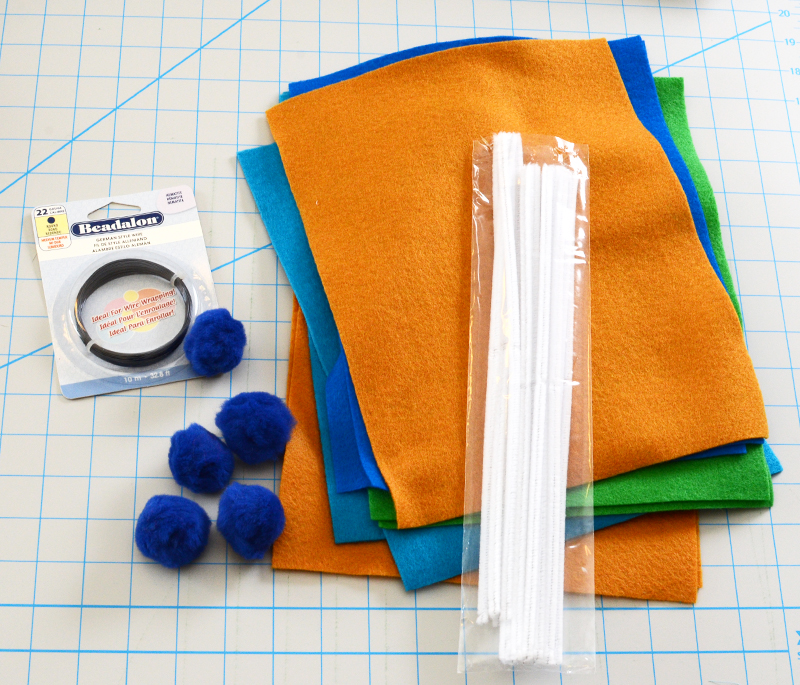
Before I got going I bought:
- white pipe cleaners
- blue puff balls
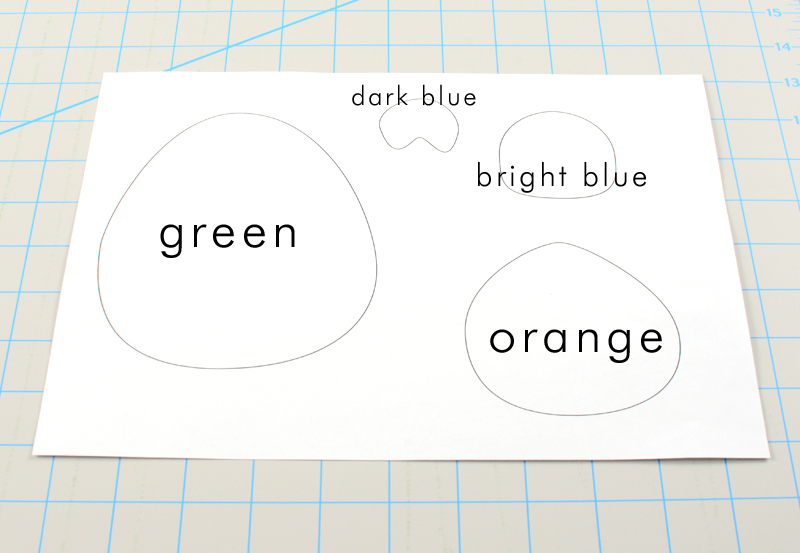
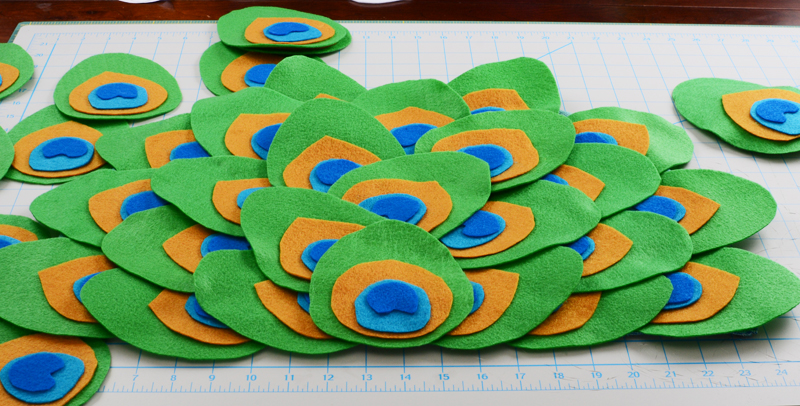
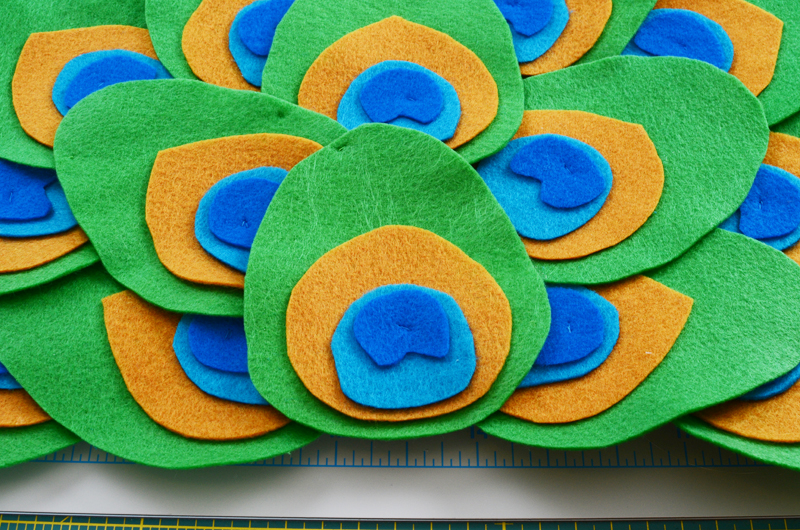
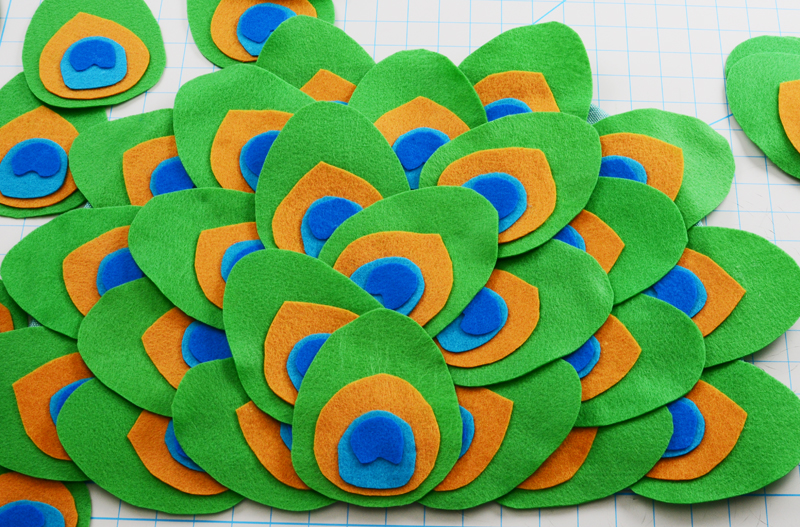
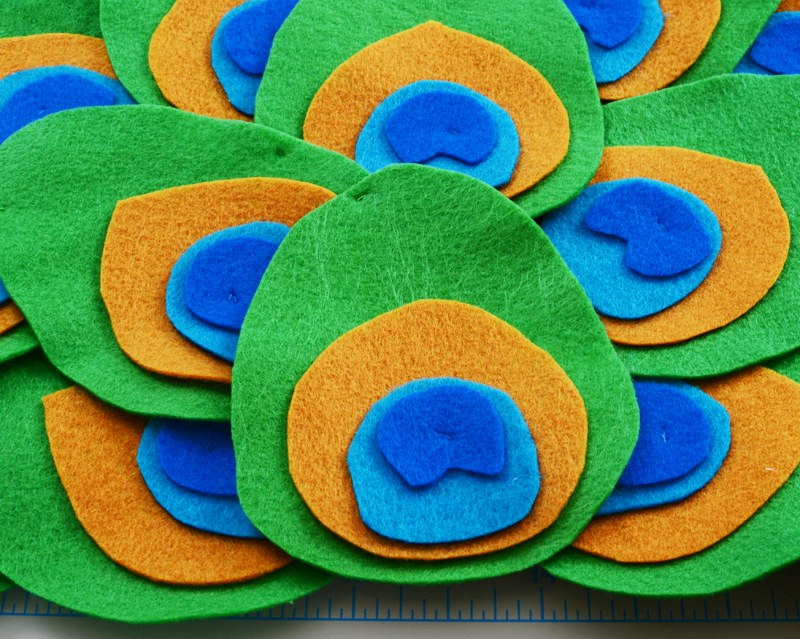
- green, orange, bright blue and dark blue felt: I ended up making a total of 40 feathers. I needed 10 green sheets (4 from each one) 6 orange sheets (7 from each one) 3 bright blue sheets (16 from each one) and I think 2 dark blue (can’t remember).
- 22 gauge wire
- Aleene’s fabric glue
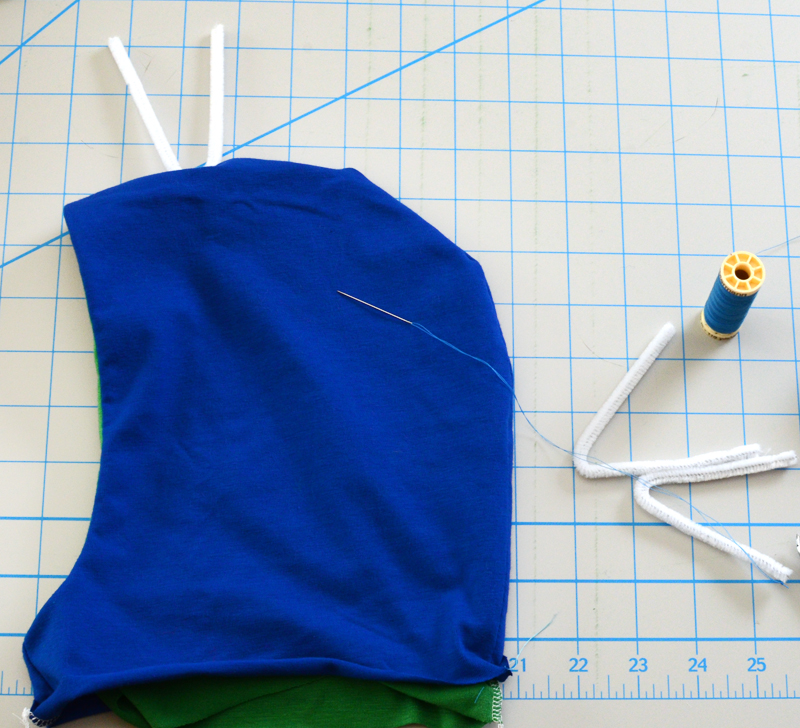
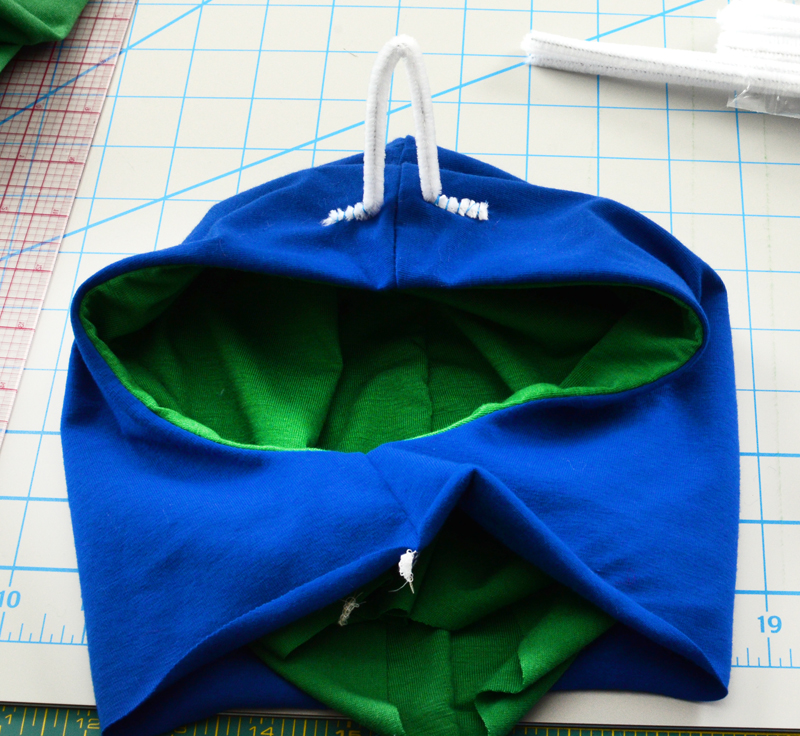
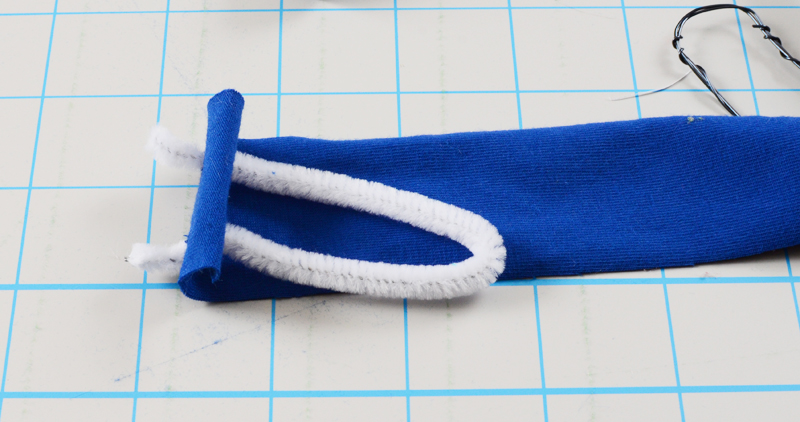
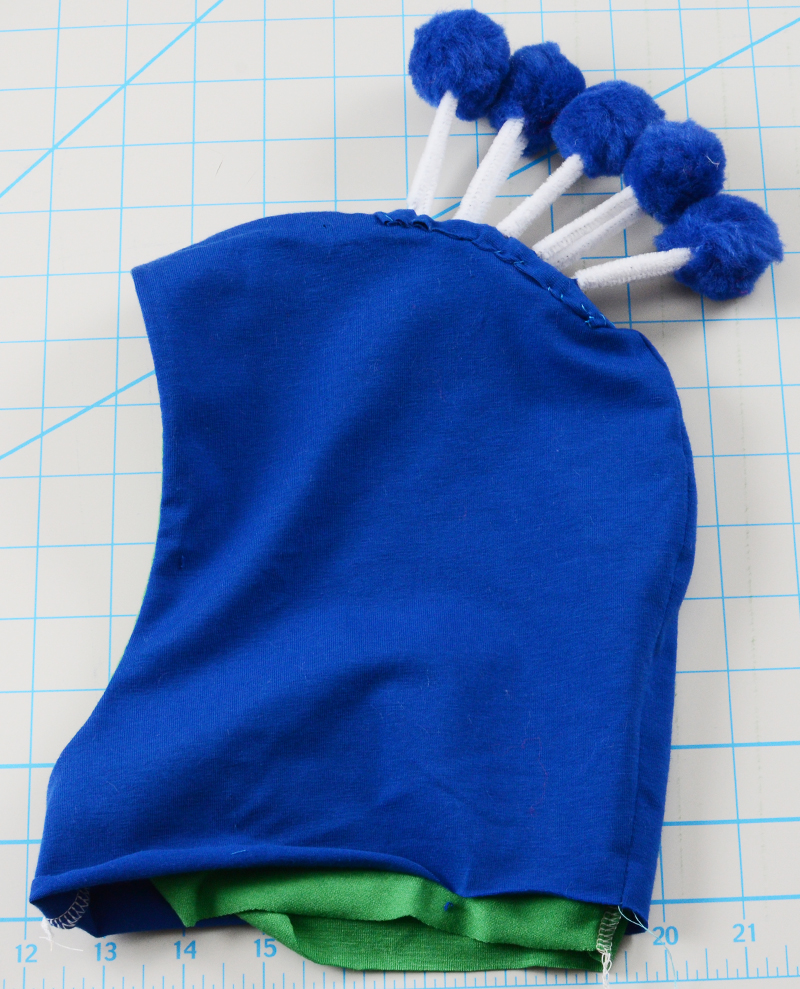
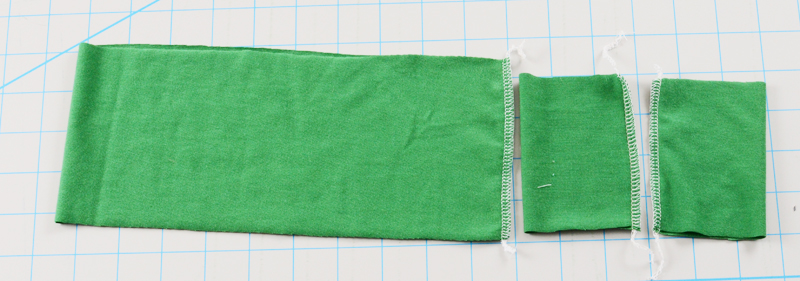
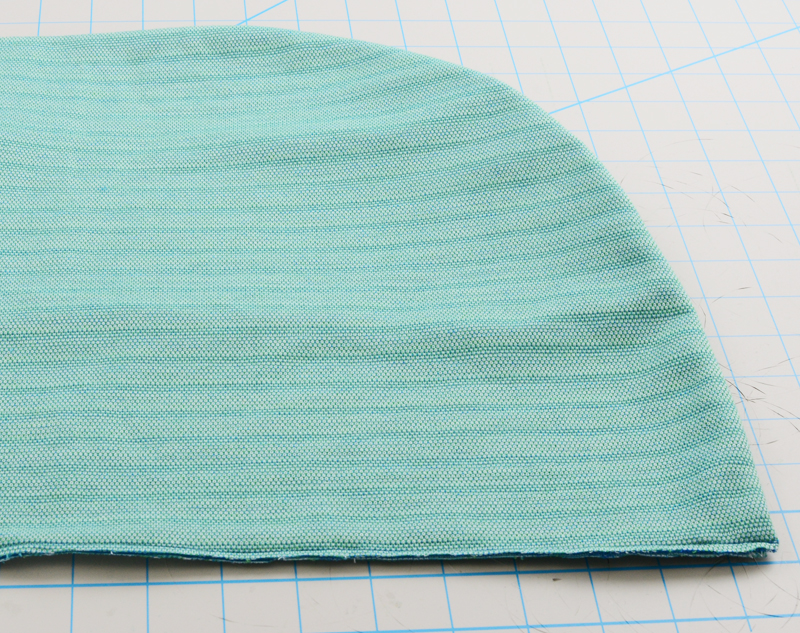
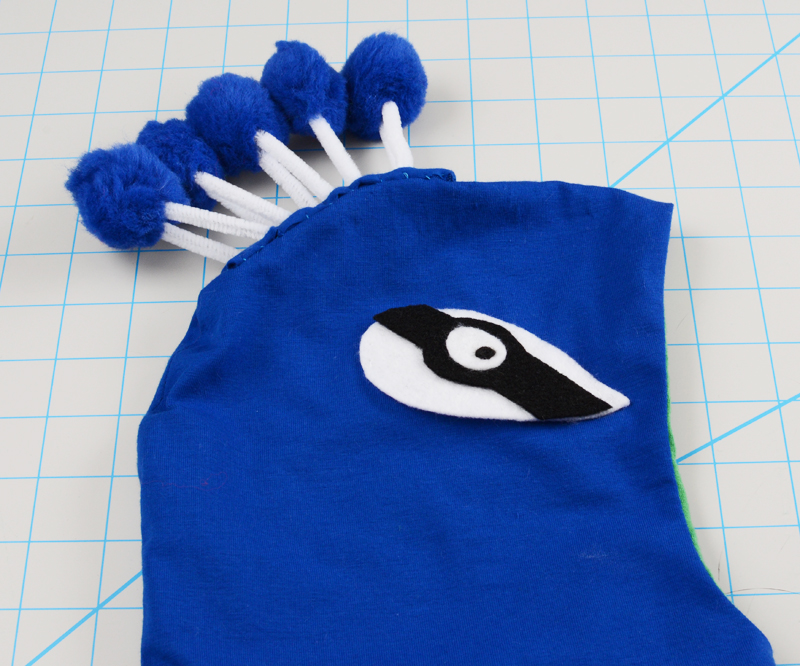
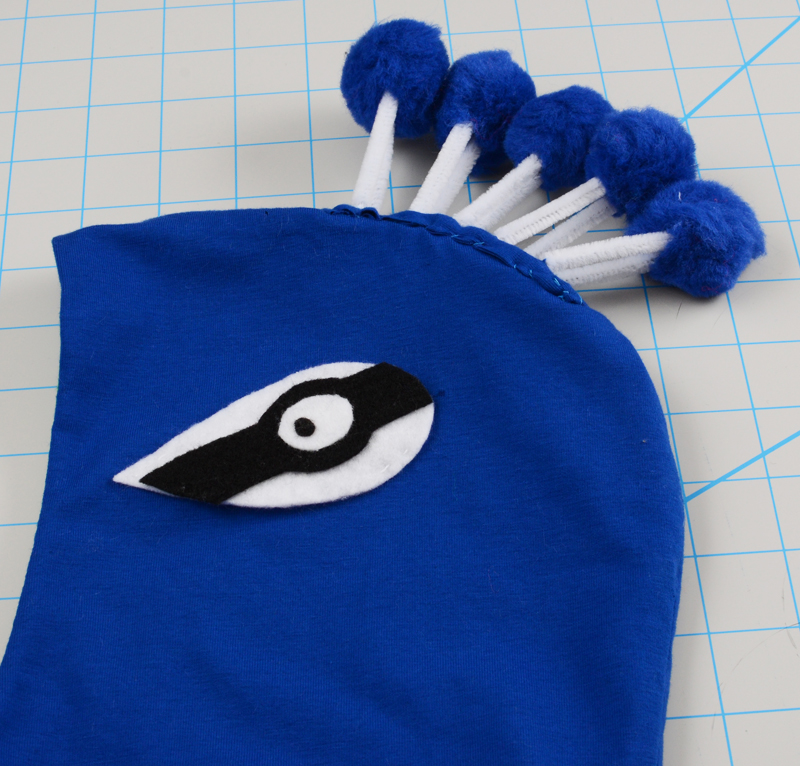
I sewed my hood together: it’s blue with green lining.
Then, tried to get the crest feathers attached to the top of the head. This was not fun! I figured it out for you though so you will have an easier time. I first tried sewing them into the middle seam. DID NOT WORK, they just flopped over! 🙁 Then, I tried bending them in half like the following photo and hand sewing them to the head. ALSO DIDN’T WORK! Flopped over again 🙁
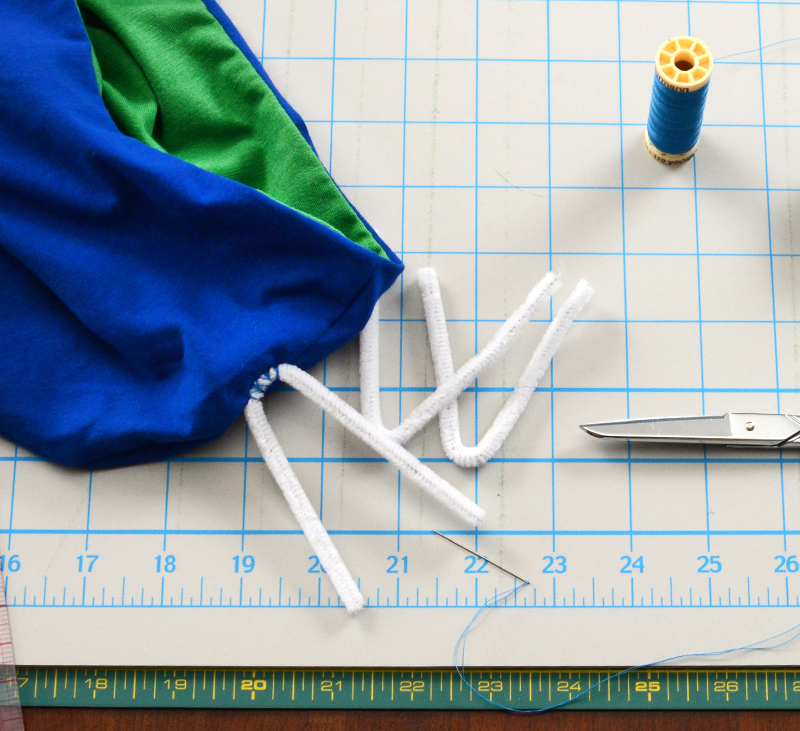
THEN, I tried to turn them over and sew them on so they were more stable. It kind of worked but was NOT pretty.
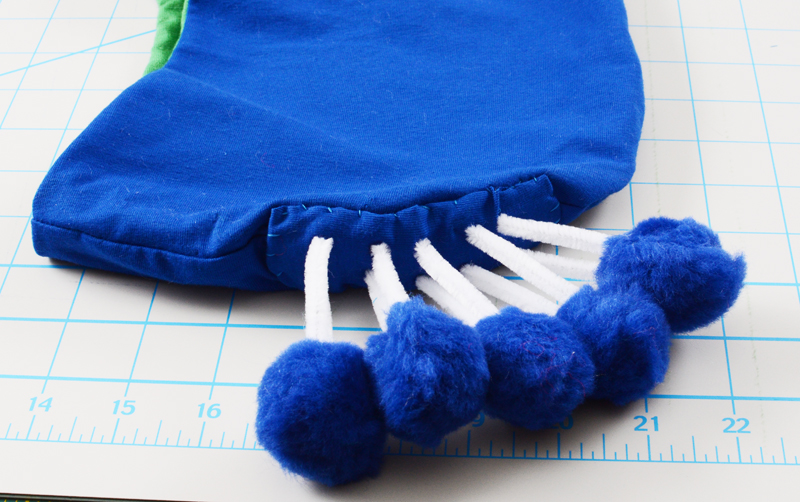
I realized I needed a stiff base. So, I bent some wire into a 1″x 4″ rectangle and wrapped it a few times to make it stable.
Then, I cut out a piece of fabric (that matched the hood) a little wider than the wire piece and twice as long. I poked two ends of a the pipe cleaner through it and wrapped them around the sides of the wire. FINALLY! I was super stable and was not going to flop over!
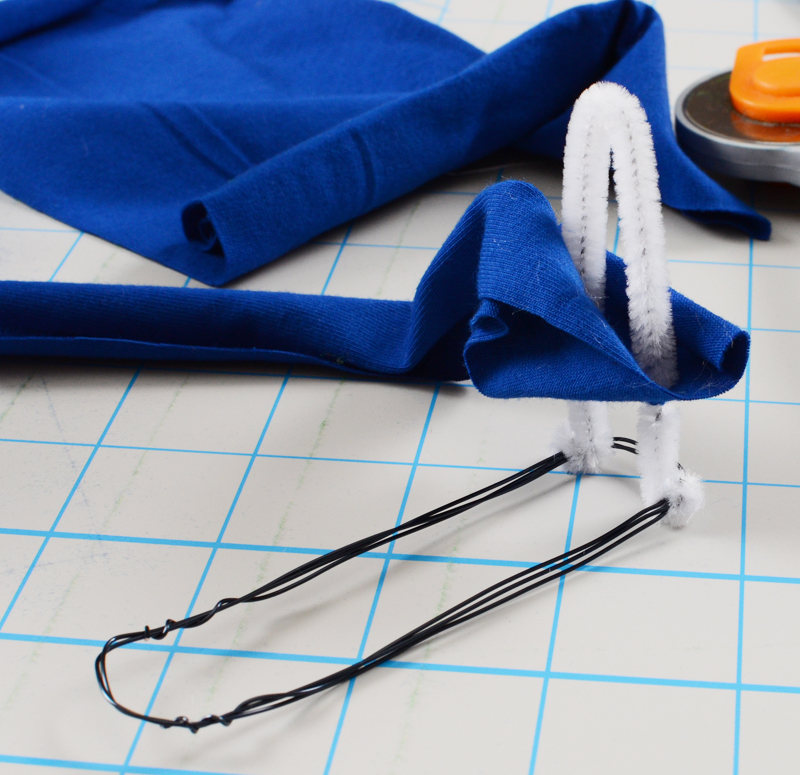
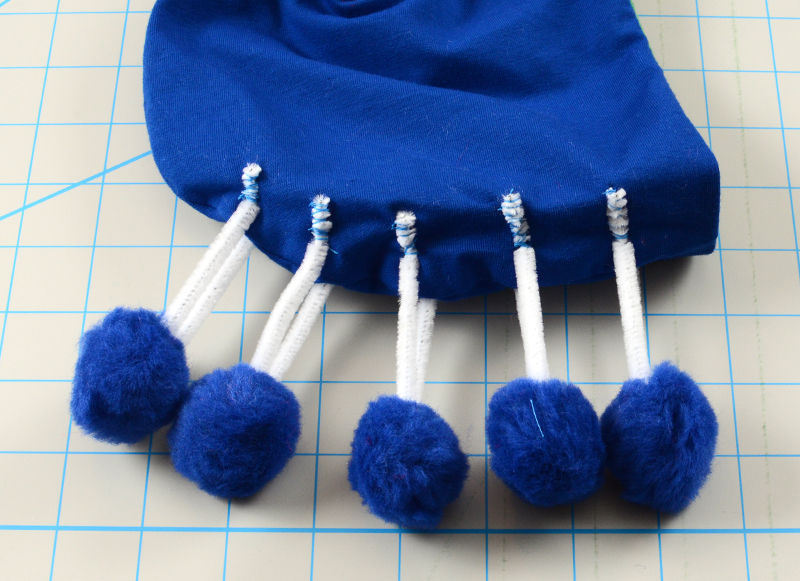
I then UN-stitched my crest feathers from the hood and poked them all through the fabric strip and wrapped the ends around the wire rectangle. BTW: I super glued the blue puffs to the pipe cleaner.


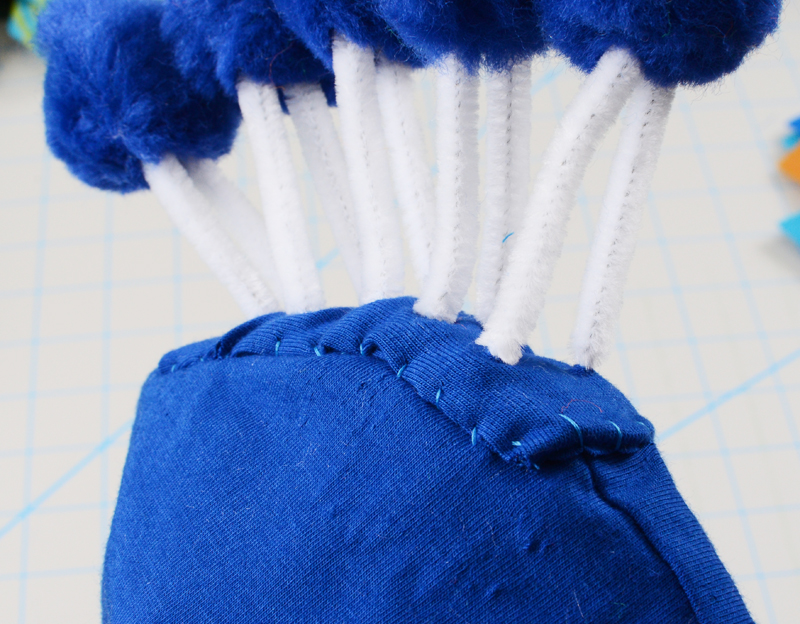
I folded the fabric strip underneath the wire and sewed it together on the short end. I left the sides open.
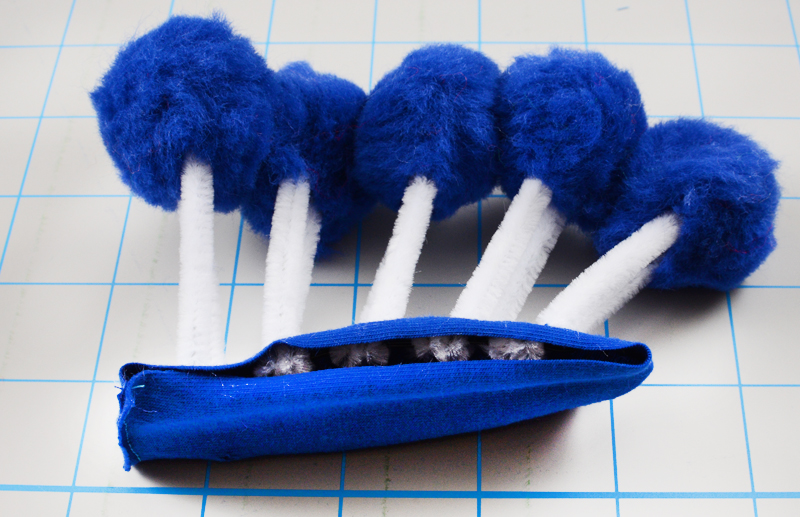
I pinned the crest to the hood where I wanted it and hand stitched around all the edges to get it to stay.
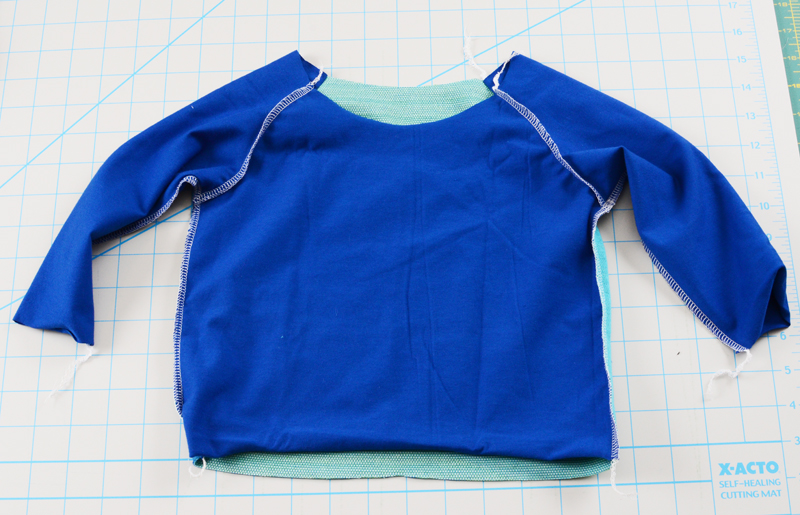
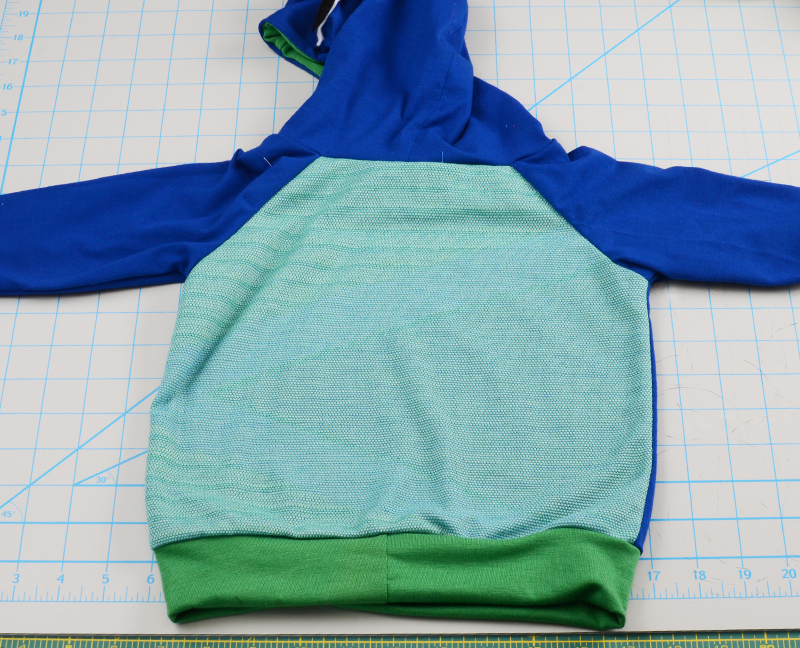
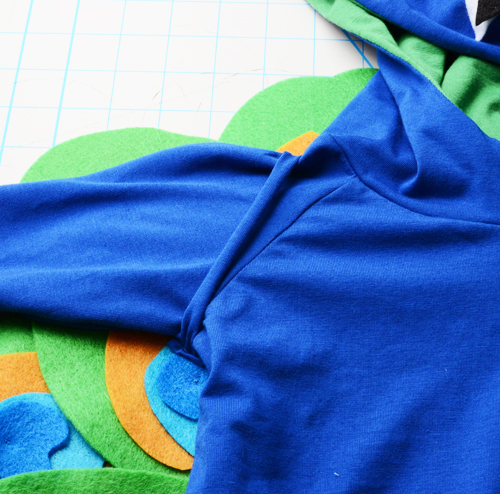
Next, I sewed my sweatshirt together and attached the hood.
It’s kind of starting to look like my original scribbles! I love when an idea starts coming alive! 🙂
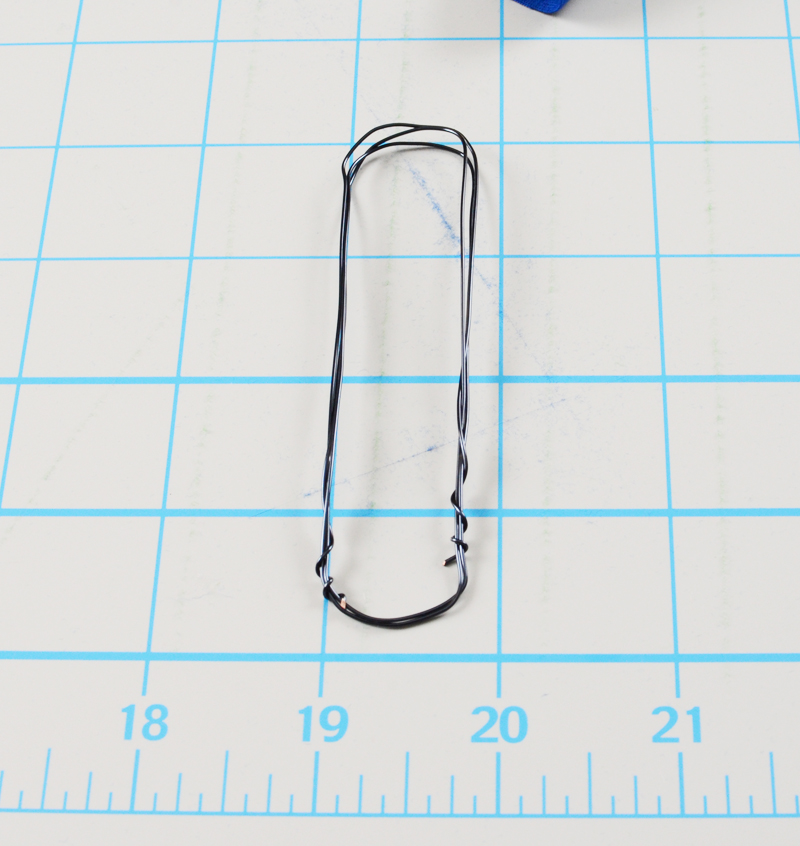
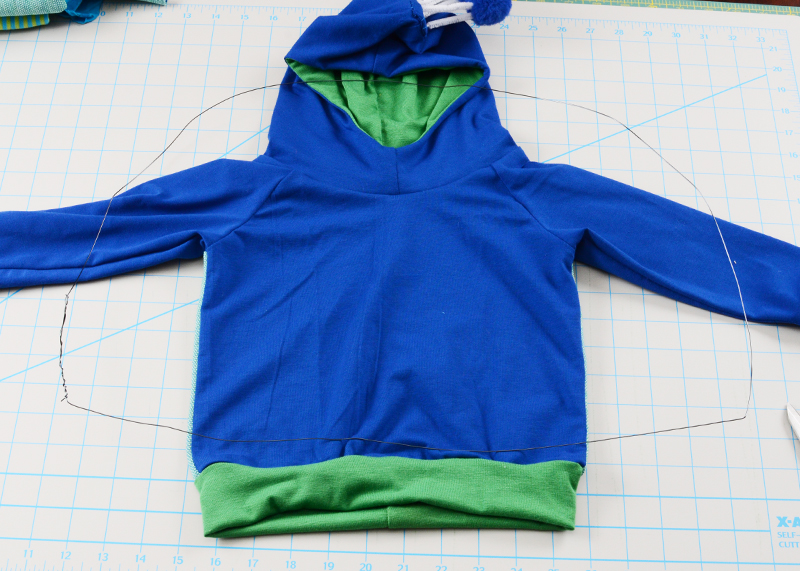
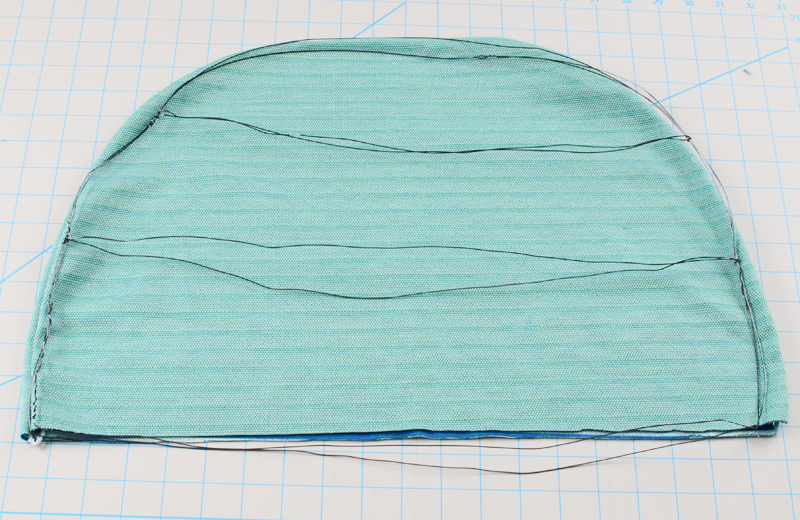
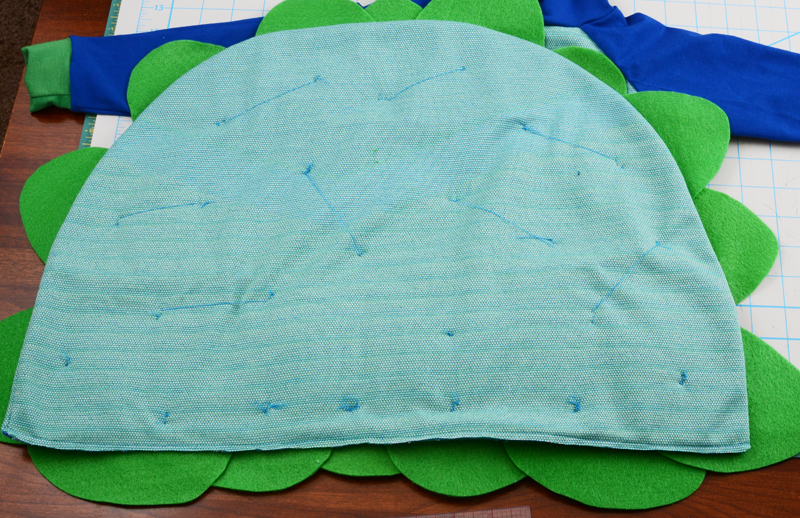
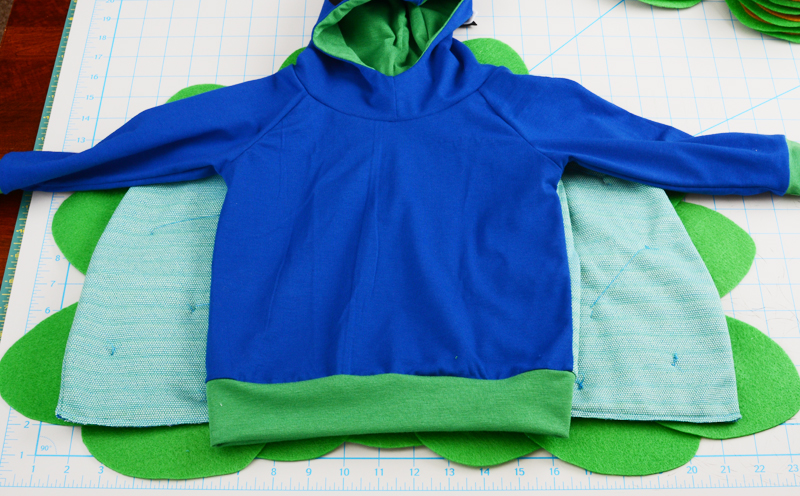
I used the wire to bend a shape approximately the size I wanted the back feathers to be. I bent it on top of the sweatshirt to get a good reference of the size I wanted.
It ended up being 20″ wide and about 13″ tall.

I cut 2 pieces of fabric the same size. I cut on the fold so it’s equal on both sides.
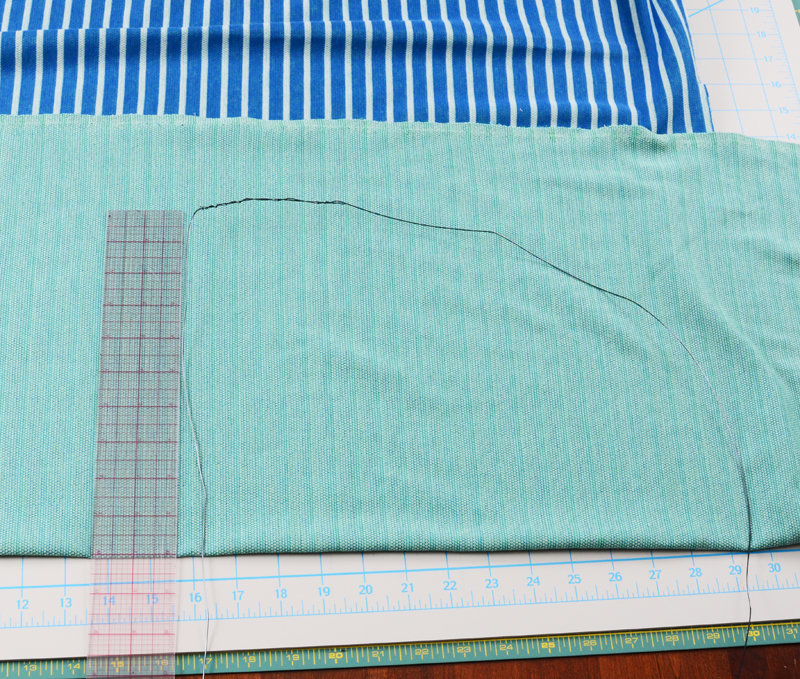
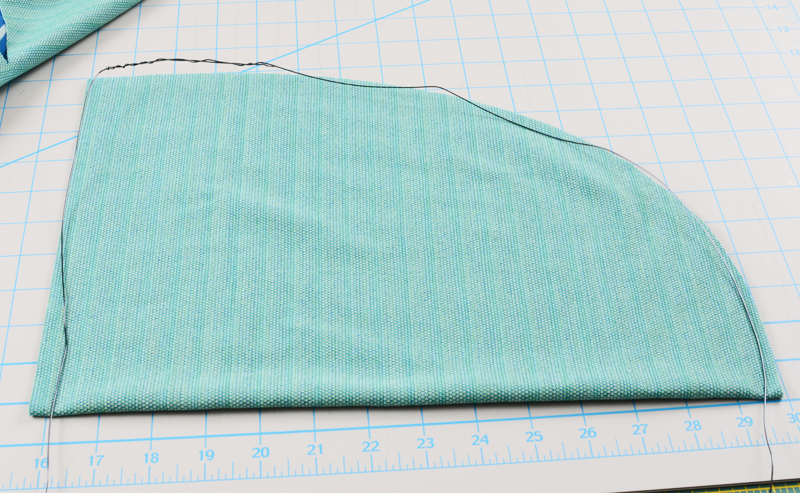
I sewed the pieces together along the top arc. Leaving the bottom open to put the wire inside.
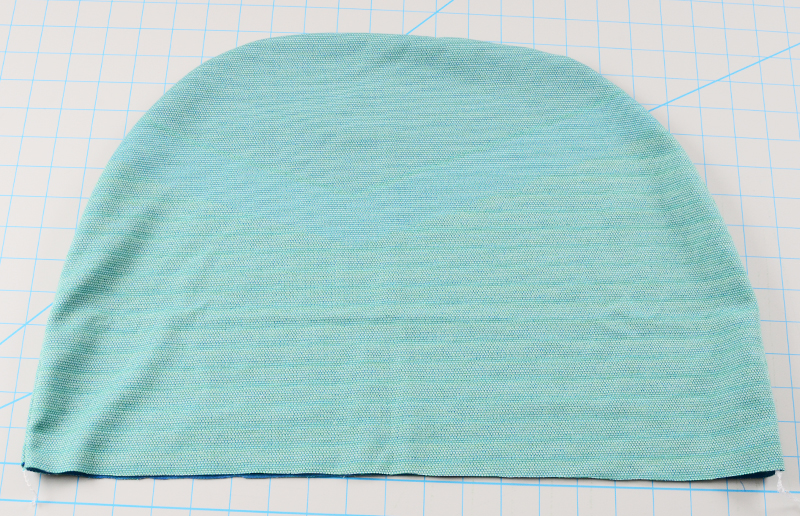
For support when I sew it onto the sweatshirt I put two lines of wire across the middle of the wire “structure”. Then, I placed the wire inside the fabric and sewed it shut along the bottom. You won’t see this seam when you’re done so don’t worry about it!
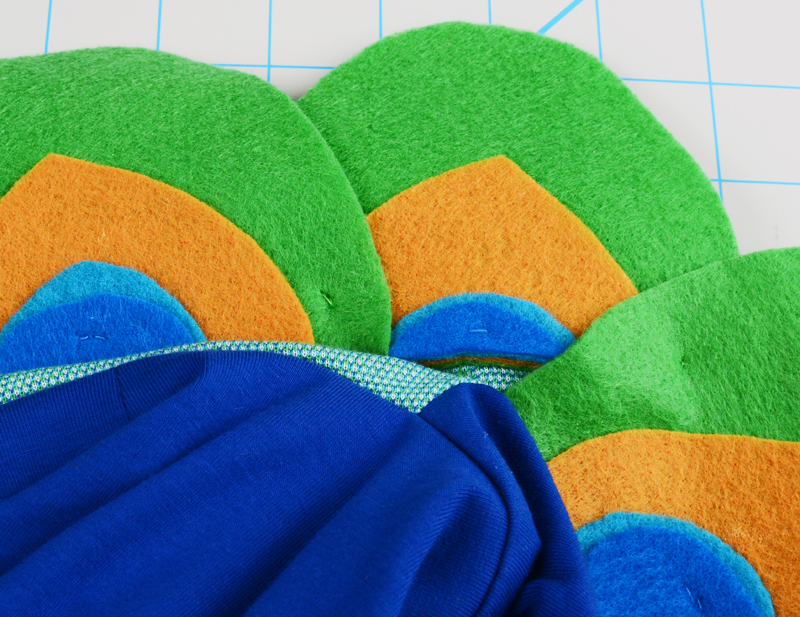
I quickly drew up some shapes for the feathers and the eyes in a paint program and printed it to start cutting the felt.
While cutting the feathers, I always doubled the felt, made it go way faster! I didn’t buy NEARLY enough green so I have to go back to the craft store. WOW I grossly underestimated the amount of work this was going to be!
I also needed a little more orange so back to the store I went. The feather process gets a little tedious so queue up some music or podcasts 😉
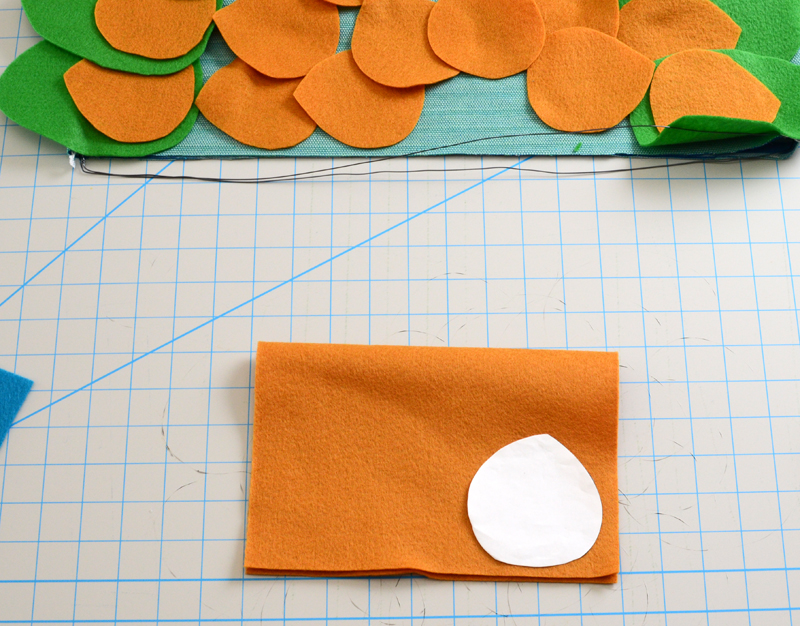
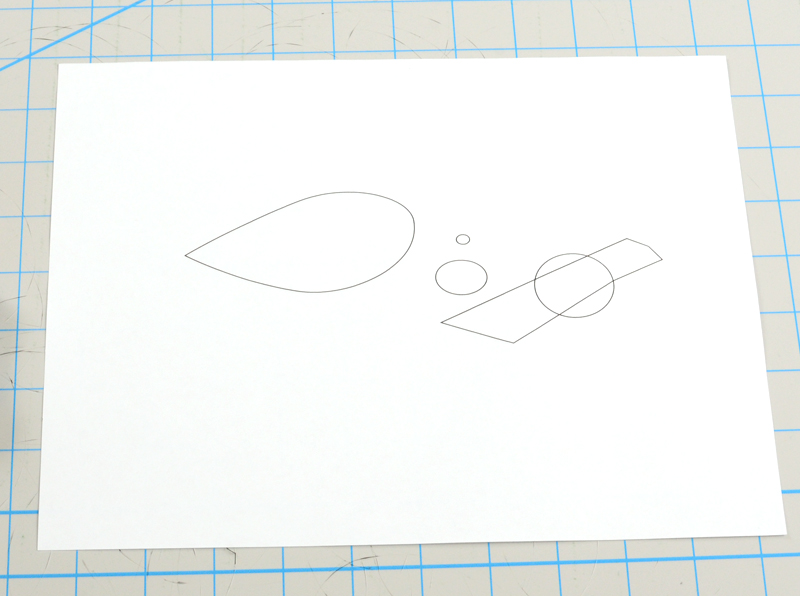
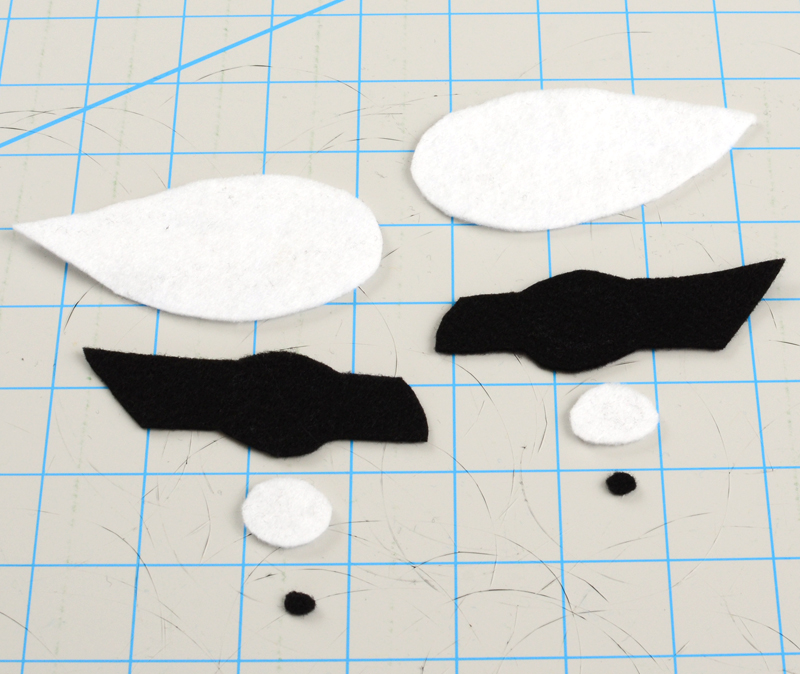
I cut the eyes out of black and white. That was quick and easy!
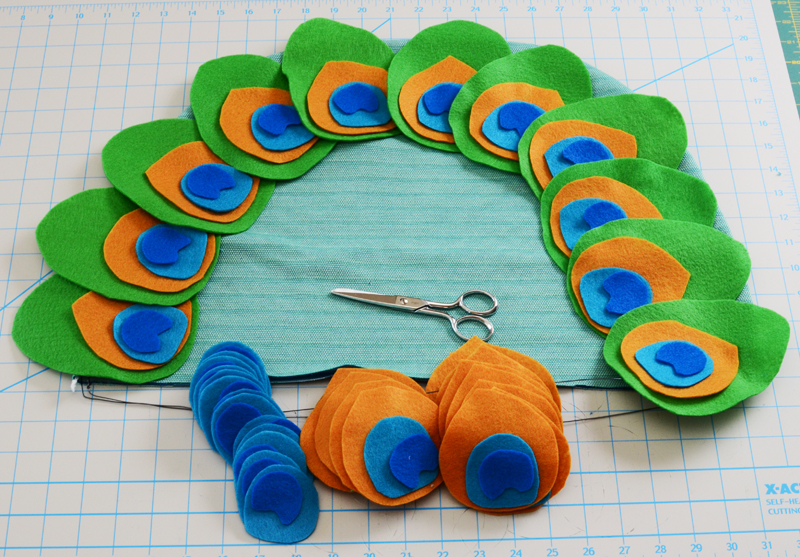
Got back from the store and finished cutting out my feathers. THEN, started the tedium of gluing them all together. I promise the end result is worth it! I used Aleene’s fabric glue, it worked great. I let the felt dry overnight. Mostly because I had enough for the day 😉
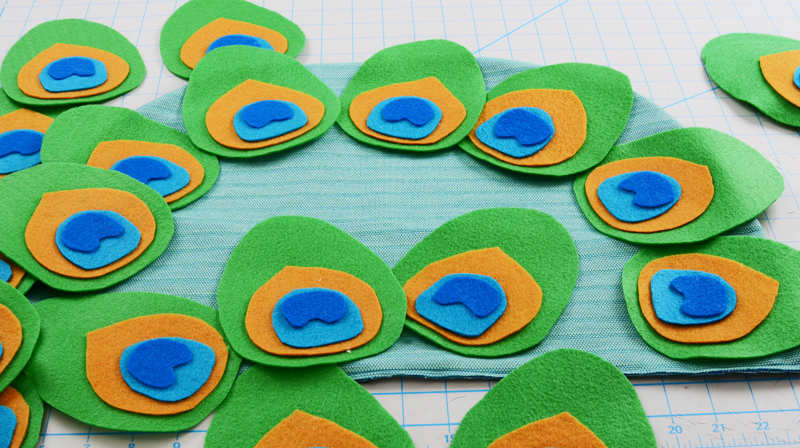
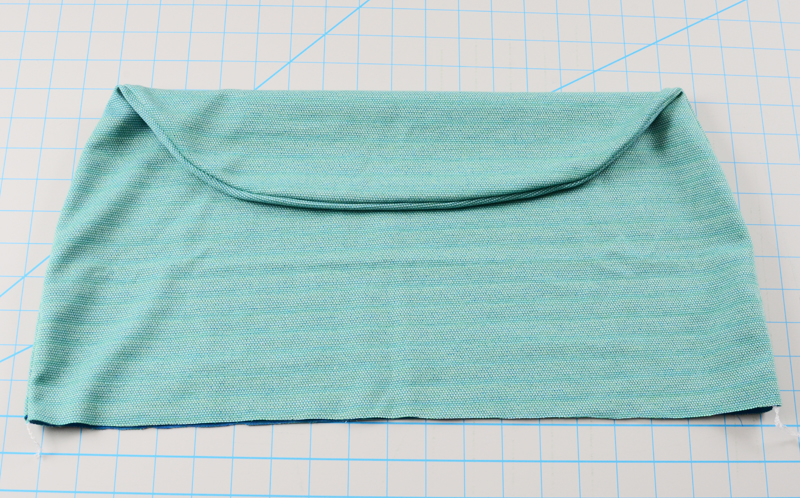
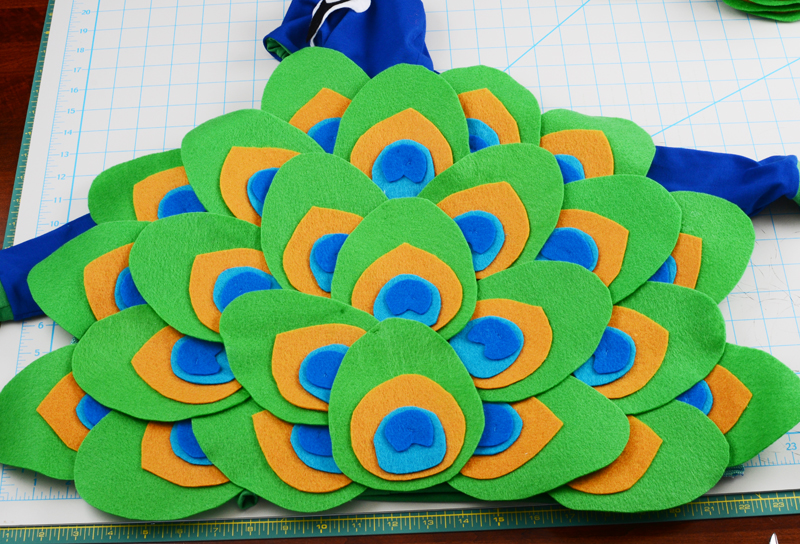
The next day, I arranged all the feathers how I liked on top of the fabric/wire arc. And actually just stitched them all to the fabric. 1 double stitch in the middle through all layers of felt. I was worried about the glue holding up so I decided to stitch them all. It worked great! Plus, I know we won’t be leaving a feather trail on the street.
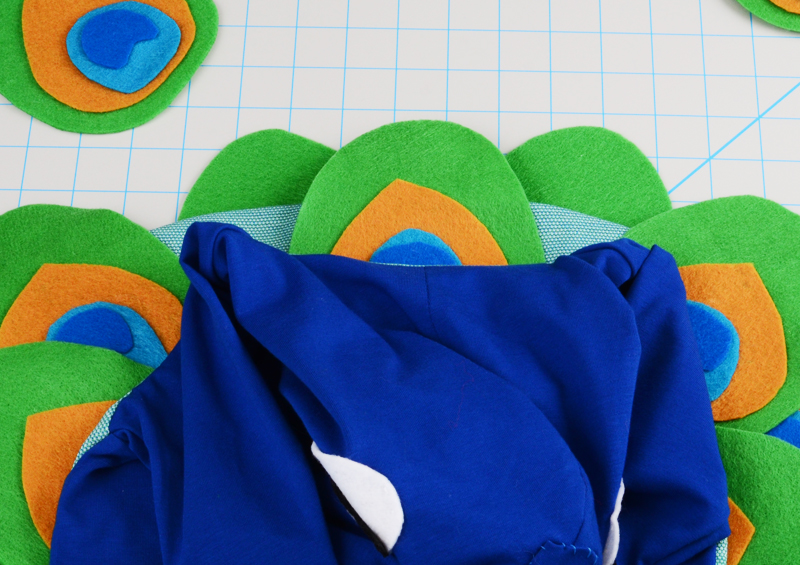
I also stitched some of the feather tops together. Enough so they didn’t flop at all and held their shape when I lifted and shook it. That last photo is the back after all the feathers were stitched on.
I also hand stitched the eyes to the sides of the hood. A few white stitches and a few black stitches was all it needed. I went through both layers of hood so it was more stable.
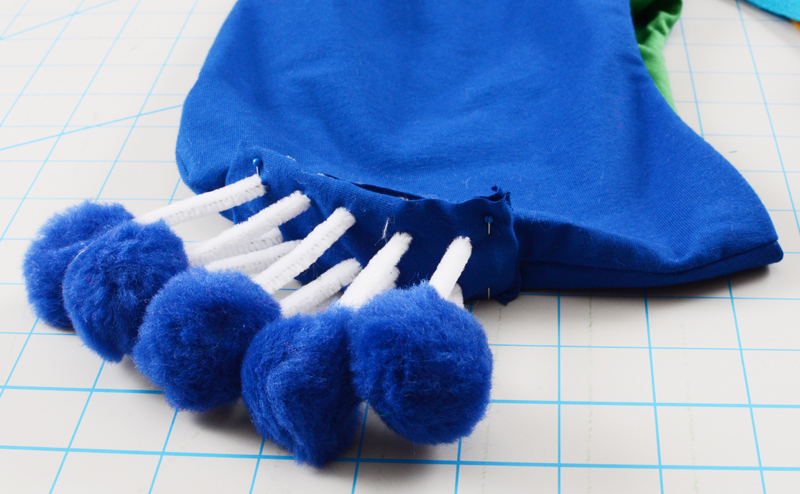
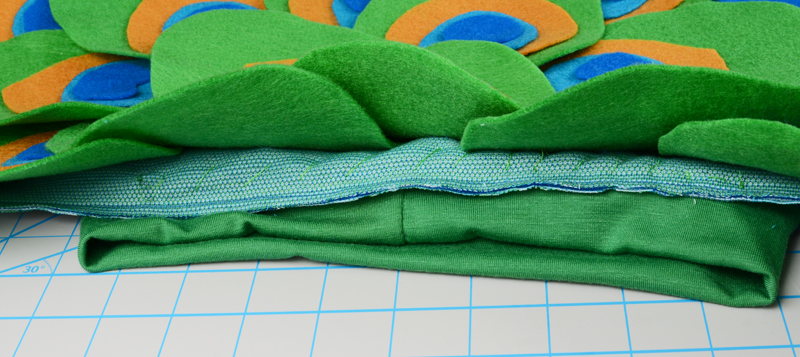
Now, I get to sew the feathers to the back! I’m getting pretty excited! I turned the sweatshirt face down and placed the feather arc on top so the bottom was lined up with the waist. You can place it anywhere you want though!
I used large hand stitches to secure the bottom of the feather arc to the waistband of the sweatshirt. It’s underneath the feathers so no one will see it.
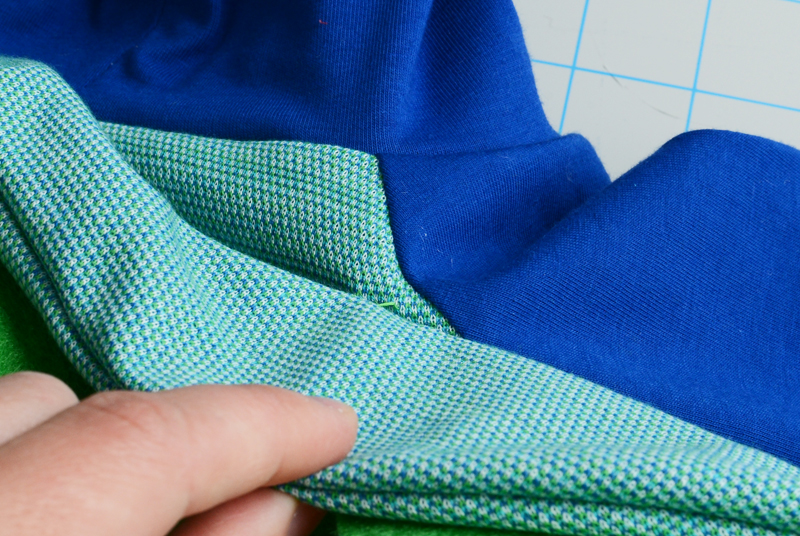
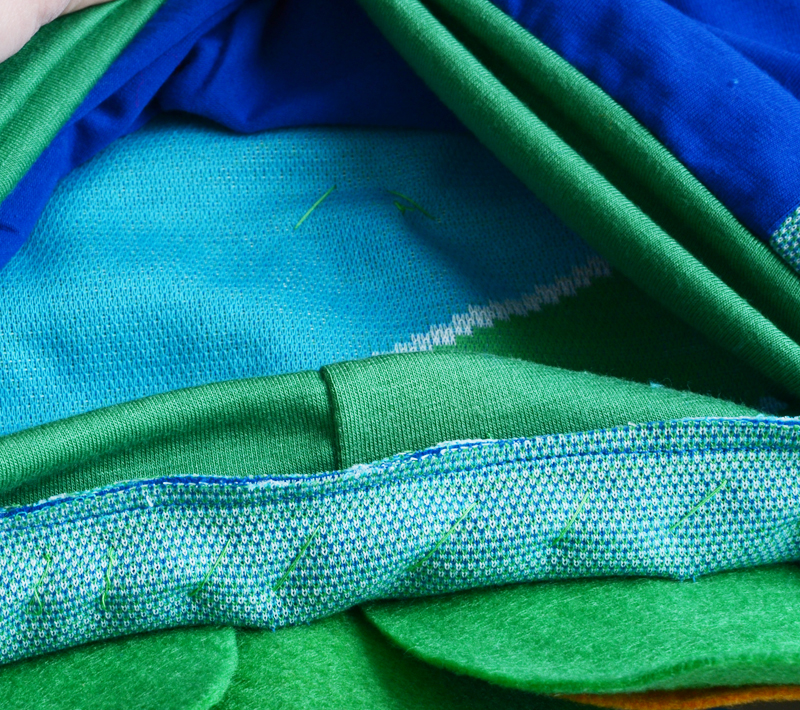
Then, I sewed the arc to both shoulders. Behind the feathers again so it’s hidden.
I also sewed the middle wire onto the middle of the back to hold that in place.
Now, the front needs feather. I turned it over to see where the feathers needed to be and arranged them on top.
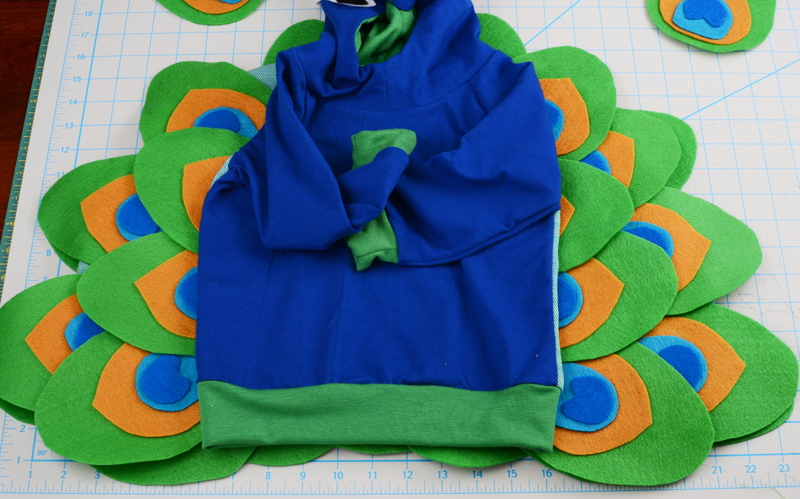
I couldn’t fit a full feather at the shoulders where I stitched the arc so I cut them shorter to fit. I stitched the feathers on like I did on the back and also stitched some of the front ones to the back ones to hold them together. You will have to use your best judgement when sewing the feathers on. I had no rhyme or reason. I just made it work 😉
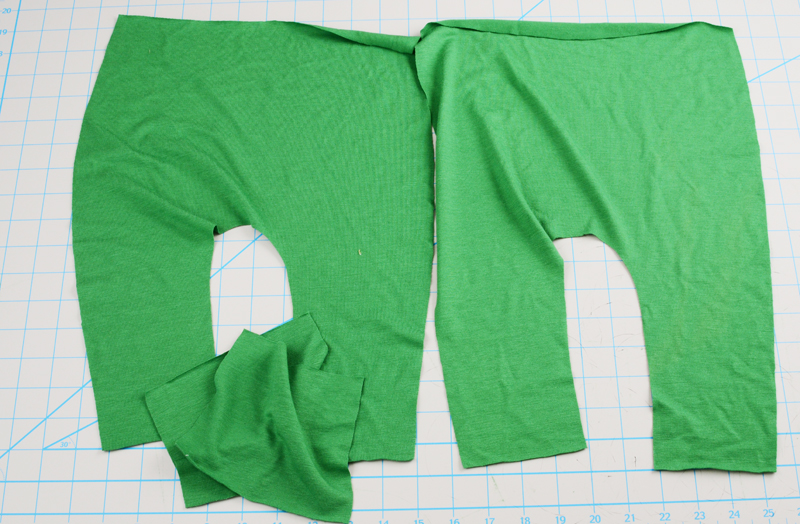
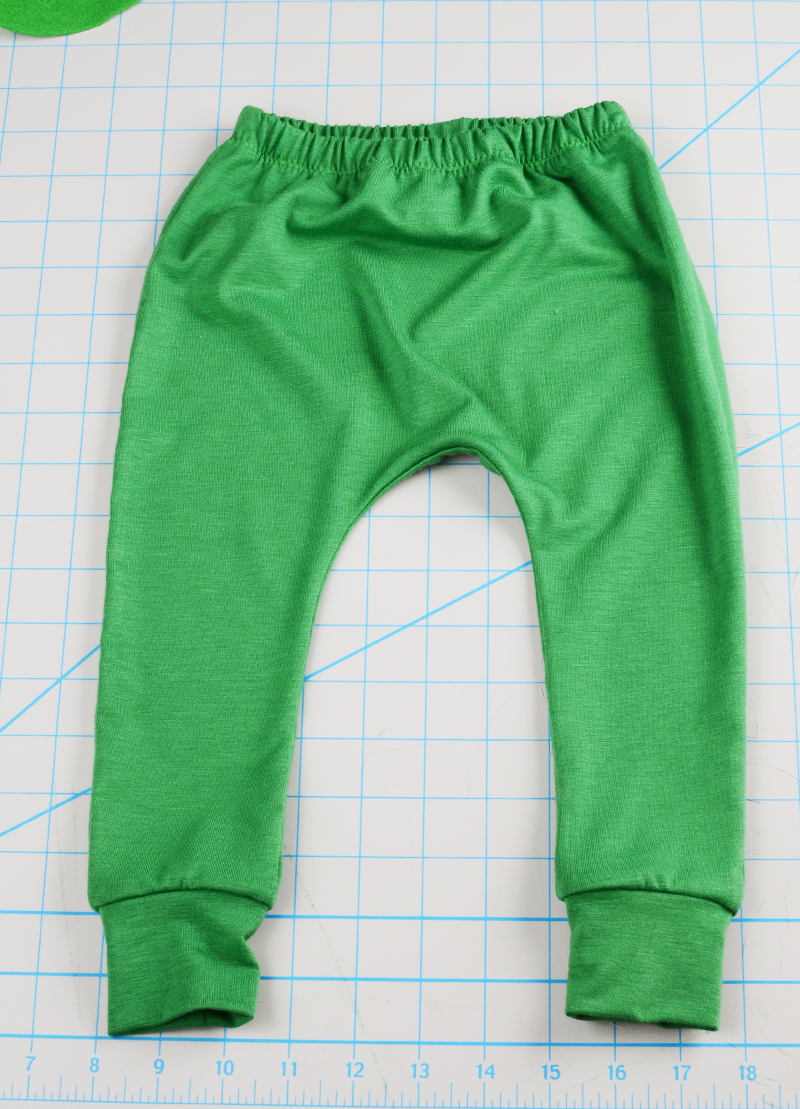
Finally, the feathers are done! Now, time to make the pants.

I kept it simple for the legs and used the same fabric as the cuffs to make some slim harem pants.
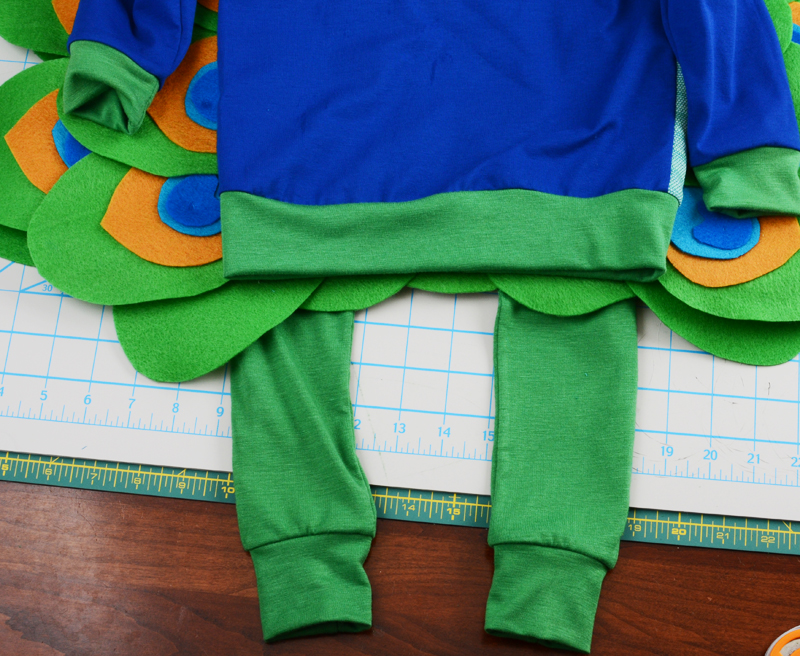
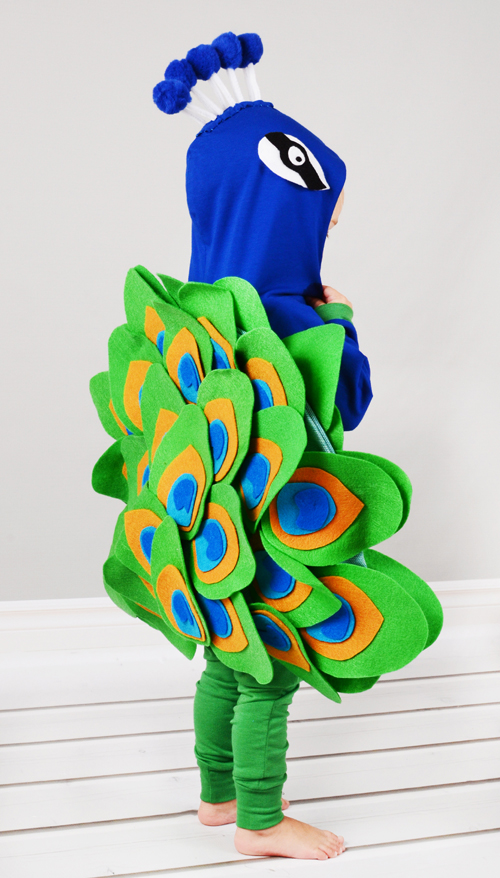
And the whole outfit is done now! I got Eleanor to try it on. She didn’t like the feathers, she kept trying to pull them off. But, I managed to snap a couple photos.
If you are wanting to make your own, you can use these feather and eye sketches. Trust me, I did them in about 30 seconds so they can be improved but feel free to use them anyway 🙂
After I took those photos, I noticed the feathers were a little heavy and were pulling down on the shoulders so I recommend putting a little fabric strip for arm straps at the shoulder to support the feathers. 🙂 I added one to each shoulder.
If you need a hoodie pattern mine is here. Otherwise, any hoodie will work.
Have fun!
Also, try some funky colors for the peacock and please share if you make one! The sharing facebook group is here.
I’ll be back soon! -Melissa